Image and Document Management
Each site should have 'documents' and 'images' folders. These folders should be used for storing documents and images, but Cascade is not necessarily going to manage that for you. If you are adding a document or image to your site, make sure to put it in the correct folder. If you put it in the wrong folder, move it to the right folder and Cascade will automatically track the location.
Adding an Image to Cascade
There are two different methods to adding images into Cascade CMS. We will outline both options below. Regardless, images should be cropped and edited to the appropriate "web safe" size before uploading. Images should be approximately 300px wide if landscape, or 200px tall if portrait. Cascade can assist with minor editing after the image is uploaded.
Uploading/Adding an image while editing a page
- Resize the image. Images should never be "full-resolution" on the web.
- Login to Cascade > go to your website > Edit a page
- Click on the Image icon in the WYSIWYG tool bar. (Fig. 1)
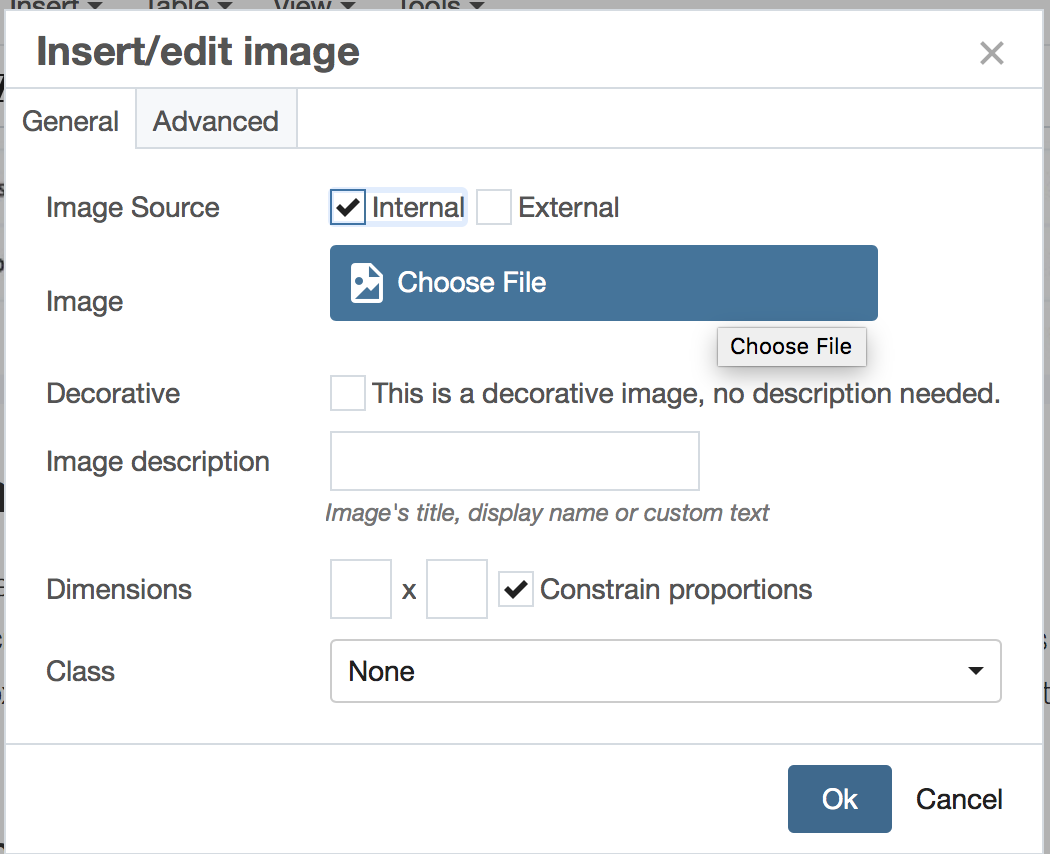
- Click "Choose File" (another dialog opens, Fig. 2)
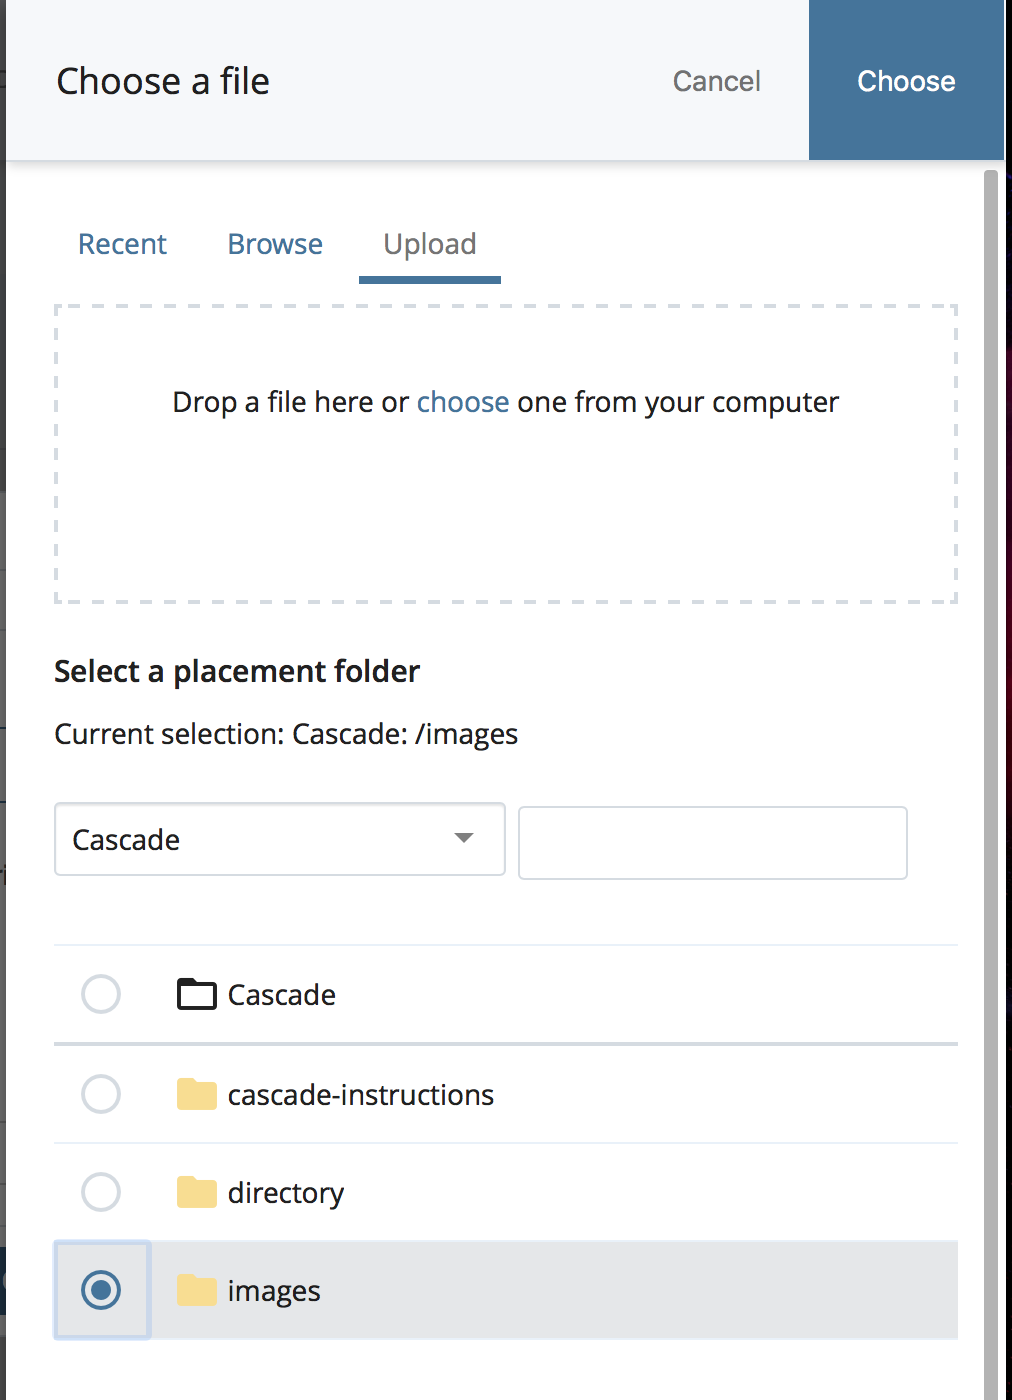
- If the file is already in cascade, use the "recent" or "search" tool. If not, choose the "Upload" option (Fig 3)
- Ensure you update the placement folder before uploading.
- If this image is purely decorative, use the checkbox to mark it as such. Otherwise, fill out the Image Description. Do not use words like "image/photo of."
- Save your draft > Submit changes when you're ready.

Adding an image, without editing a page
When adding an image while not editing a page, it's also important to note you should resize the image before uploading it to Cascade CMS.
- Resize your images. Login to Cascade and go to your site.
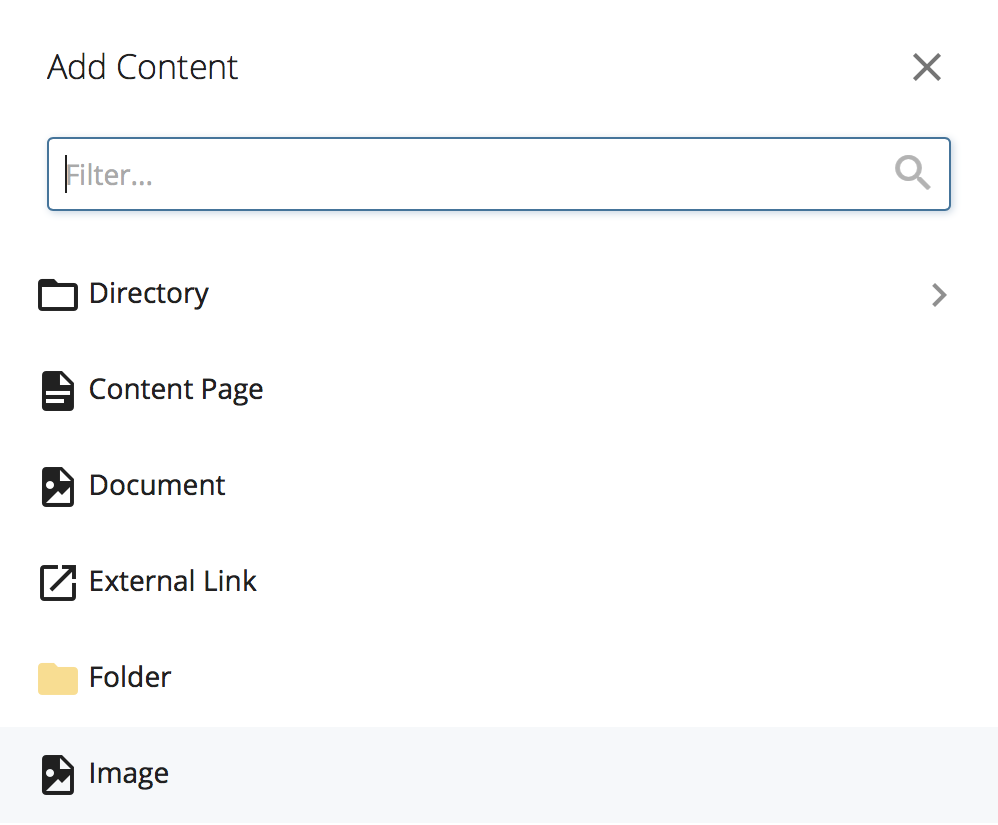
- Choose Add Content > select Image (see Fig 4).
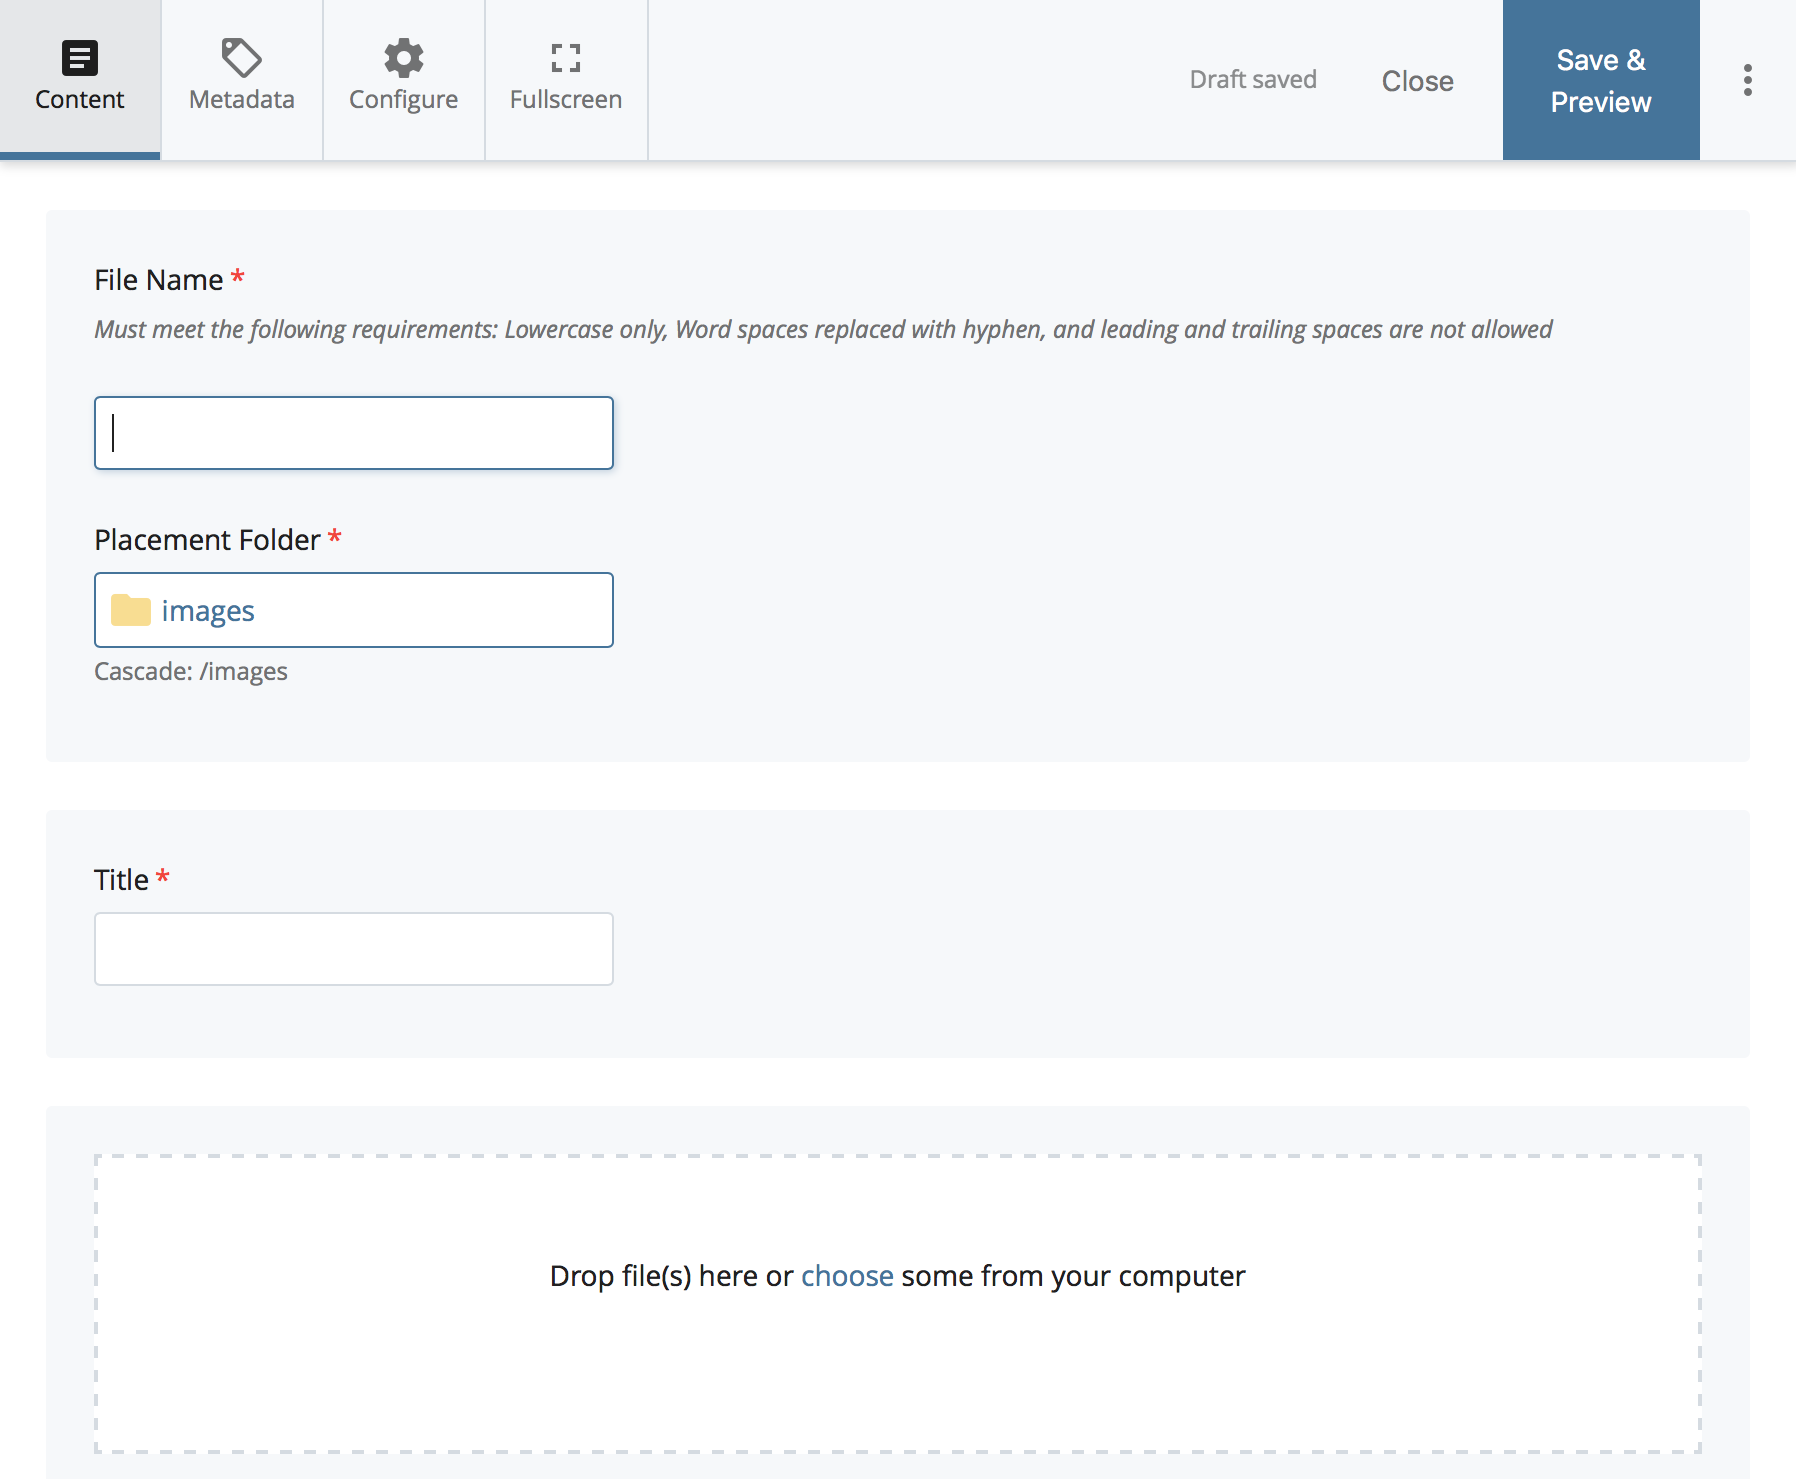
- Add the file name (no spaces, all lowercase) > Ensure the placement folder is set to images > Add a title (Fig 5)
- Select the image from your computer and press "save & preview" > Submit your changes.
- Go back to editing/updating your site.